
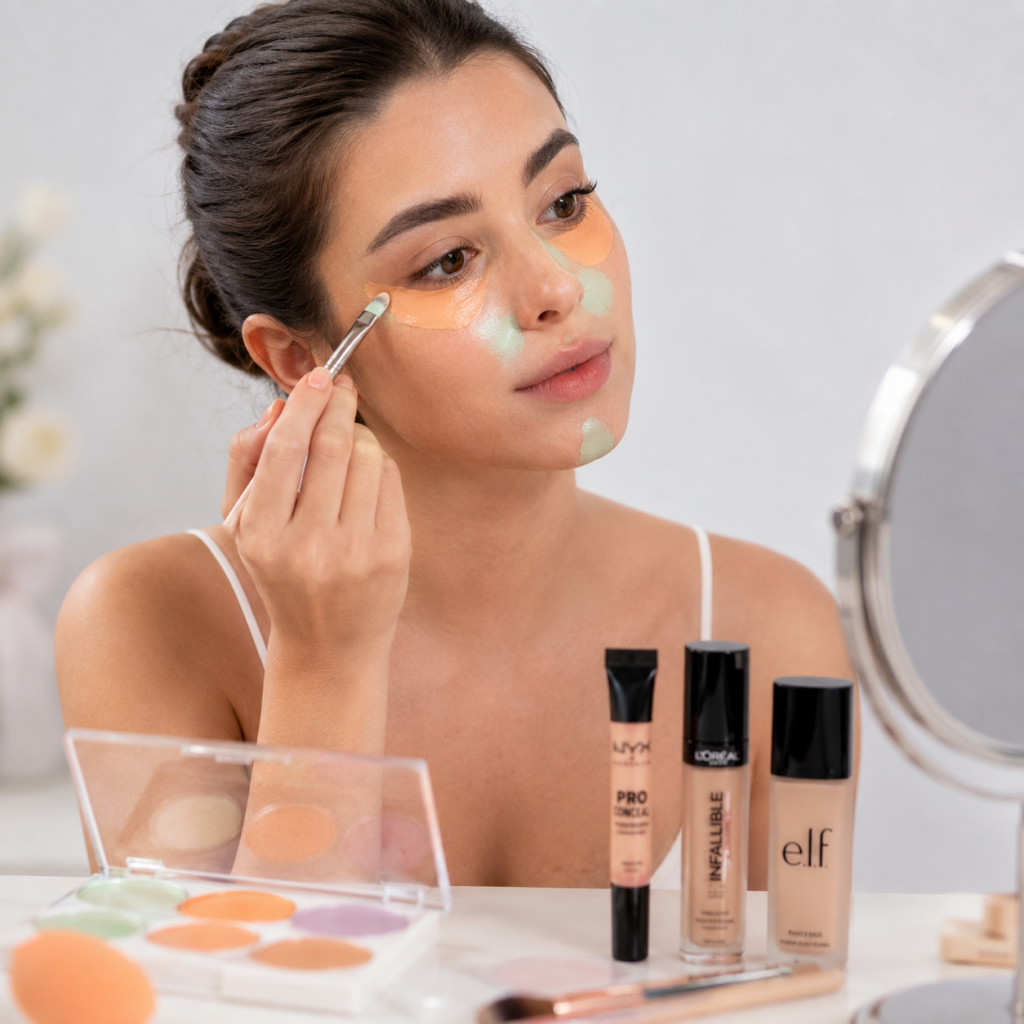
If you’ve ever stood in the makeup aisle staring at green, peach, lavender, and orange products wondering what any of them actually do, you’re not alone. Many people buy a correcting product hoping it will erase dark circles or redness, only to end up with makeup that looks patchy or overly layered. If you’re trying to figure out how to use color corrector without making your makeup look heavy or obvious, the good news is that the process is much simpler than it seems once you understand which shades work for your specific concerns.
The truth is that these products aren’t meant to replace foundation or concealer. They’re designed to solve specific complexion concerns before the rest of your makeup goes on. When used correctly, they can help you use less coverage overall while creating a smoother, more natural-looking finish.
In this guide, you’ll learn how to use color corrector effectively, how to choose the right shade for your skin, and the techniques makeup artists rely on to keep everything looking seamless.
Why So Many People Struggle With Color Correction
One of the biggest misconceptions is that every discoloration issue should be covered with concealer. While concealer certainly has its place, it doesn’t always neutralize unwanted tones underneath the skin.
Think about dark circles. If the area beneath your eyes has a blue, purple, or gray cast, applying a skin-toned concealer on top may dull the appearance, but the underlying color can still peek through.
That’s where color theory comes in.
Instead of simply covering the problem, correction works by balancing the unwanted tone before foundation is applied. The result is often a brighter, more even complexion that requires less makeup overall.
Understanding Color Theory Without the Confusing Makeup Jargon
You don’t need to memorize an artist’s color wheel to understand how this works.
The basic idea is simple: opposite colors neutralize one another.
For example:
- Green helps balance visible redness.
- Peach helps soften blue or purple under-eye shadows.
- Orange can reduce the appearance of deeper pigmentation.
- Lavender can brighten areas that appear dull or yellow.
This is why different shades exist. They’re not designed for different makeup looks, they’re designed for different skin concerns.
Which Shade Should You Choose?
The right choice depends on both your concern and your skin tone.
For Redness
If you struggle with redness around the nose, on the cheeks, or from occasional breakouts, a soft green formula is often the best option.
The key is moderation. A tiny amount is usually enough.
For Dark Under-Eye Circles
Not all dark circles are the same.
Fair and light skin tones often benefit from peach or pink tones because they brighten without looking obvious.
Medium skin tones generally work well with peach shades.
For deeper skin tones or more stubborn darkness, orange tends to create the most balanced result.
For Hyperpigmentation and Dark Spots
Areas of lingering pigmentation usually respond well to peach or orange shades, depending on your complexion depth.
Instead of applying product across an entire area, focus only on the discoloration itself.
For Dull or Tired-Looking Skin
If your complexion appears yellow or lacks brightness, lavender-toned formulas can add a fresher appearance under foundation.
A Simple Placement Guide
Many people use far more product than they need because they aren’t sure where it should go.
Under the Eyes
Focus only on the darkest portion rather than covering the entire under-eye area.
This often creates a more natural result while preventing buildup.
Around the Nose
Redness tends to collect around the nostrils. A tiny amount placed directly on those areas can help create a more even makeup base.
Around the Mouth
Some people experience darker pigmentation around the mouth. Targeting these areas instead of layering more foundation often produces a better finish.
On Individual Blemishes
Instead of spreading product over large sections of the face, apply it directly where discoloration is visible.
Precision usually looks more natural than broad application.
How to Use Color Corrector Step by Step
Once you’ve selected the appropriate shade, application becomes surprisingly simple.
Step 1: Prepare Your Skin
Start with freshly cleansed and moisturized skin.
Hydration helps makeup sit more smoothly and reduces the risk of patchiness later in your routine.
Step 2: Apply Primer
A good primer can help makeup wear more evenly throughout the day.
Allow it to settle for about a minute before moving to the next step.
Step 3: Apply Only Where Needed
This is where restraint matters.
Rather than painting large sections of the face, use a small amount only on visible discoloration.
You should still be able to see some skin beneath the product.
Step 4: Blend Gently
Use tapping motions rather than rubbing.
Whether you use your fingertip, a brush, or a sponge, gentle pressing motions usually provide the most natural result.
Step 5: Apply Foundation
Foundation helps blend the corrected areas into the rest of the complexion.
Use a thin layer first and assess coverage before adding more.
Step 6: Add Concealer if Necessary
Sometimes correction alone is enough.
If additional coverage is needed, apply a small amount of concealer only where darkness or redness remains visible.
The Technique Makeup Artists Use to Avoid a Heavy Finish
Professional artists rarely rely on thick layers.
Instead, they focus on three principles:
Thin Layers
Building gradually creates a more skin-like finish than applying a large amount at once.
Strategic Placement
Only correct what actually needs correction.
Patience Between Layers
Allow products a few moments to settle before adding the next layer.
This helps prevent slipping, creasing, and unnecessary buildup.
Adjusting Your Approach for Different Skin Types
Dry Skin
Prep becomes especially important.
Hydrating products and lightweight formulas generally blend more naturally and reduce flaking.
Oily Skin
Stick with thinner layers and set areas prone to excess shine.
Mature Skin
Avoid heavy application under the eyes. Thin layers tend to look fresher and settle less into fine lines.
Combination Skin
Different parts of the face may require different techniques, so don’t feel obligated to use the same amount everywhere.
Color Corrector vs Concealer vs Foundation
A common question is whether all three products are necessary.
Not always.
Correction addresses unwanted tones.
Concealer provides additional coverage.
Foundation helps create consistency across the complexion.
Some people only need foundation. Others benefit from all three. The best routine depends on your specific concerns and the level of coverage you prefer.
Common Mistakes That Make Makeup Look Worse
Choosing the Wrong Shade
Using a trendy shade instead of one suited to your concern often creates more work later.
Applying Too Much
More product rarely produces better results.
Skipping Foundation
Without foundation, corrective shades may remain visible on the skin.
Over-Blending
Blending too aggressively can remove the product from the area you’re trying to correct.
Correcting Everything
Not every imperfection requires intervention. Sometimes less really is more.
Tools That Make Application Easier
While fingers can work well, some tools offer greater precision.
A small brush helps place product exactly where it’s needed.
A damp sponge can soften edges and create a seamless finish.
Frequently Asked Questions
Do You Apply It Before Foundation?
Yes. Correction is typically applied before foundation so that the complexion products layered on top can blend everything together.
Can You Wear It Without Foundation?
You can, but the shade may remain visible depending on how much you use.
How Much Product Should You Use?
Start with the smallest amount possible. It’s always easier to add more than remove excess.
Can It Completely Eliminate Dark Circles?
It can dramatically improve their appearance, though some people may still prefer a small amount of concealer afterward.
Final Thoughts
Learning how to use color corrector is less about memorizing rules and more about understanding your own skin. Once you know which tones you’re trying to balance, the process becomes much simpler.
Start with a small amount, focus only on the areas that need attention, and build coverage gradually. In many cases, you’ll find that a little strategic correction creates a fresher, more natural finish than piling on additional foundation or concealer ever could. Once you understand how to use color corrector properly, it becomes one of the easiest ways to create a more balanced complexion while keeping your makeup looking lightweight and natural.