
Here’s the deal — I spent three months last winter rotating through four different haircuts trying to figure out why my face looked wider in every single photo, even after my stylist swore she was cutting for my face shape. Turns out, the problem wasn’t the haircut itself. It was the combination of length, volume placement, and fringe choice, and getting even one of those wrong undoes the other two completely. If you’ve been Googling “haircut for round face” and landing on the same recycled list of vague tips, this guide is different. I’m breaking down the actual geometry, the cuts that work, the ones that quietly make things worse, and a step-by-step protocol you can bring straight to your next salon appointment. I’ve been using the Bumble and bumble Hairdresser’s Invisible Oil to add that sleek, weight-forward finish that makes these cuts land the way they’re supposed to.
How Haircuts for Round Faces Actually Work
Round faces have roughly equal width and length, with a curved jawline and full cheeks, no sharp angles anywhere. The goal isn’t to “hide” your face. It’s to use length and volume to create the illusion of more vertical length.
Here’s the science-ish part: your eye follows lines. A haircut that creates strong diagonal or vertical lines pulls the eye up and down rather than side to side. Because of this, cuts that add height at the crown and keep volume lower at the sides tend to read as elongating, follicle to tip, the shape of the style is doing optical work.
However, the biggest mistake I see isn’t choosing the wrong length. It’s choosing the wrong width. Heavy, blunt layers at cheekbone height add width exactly where you don’t want it. That’s the detail most round-face guides skip entirely.
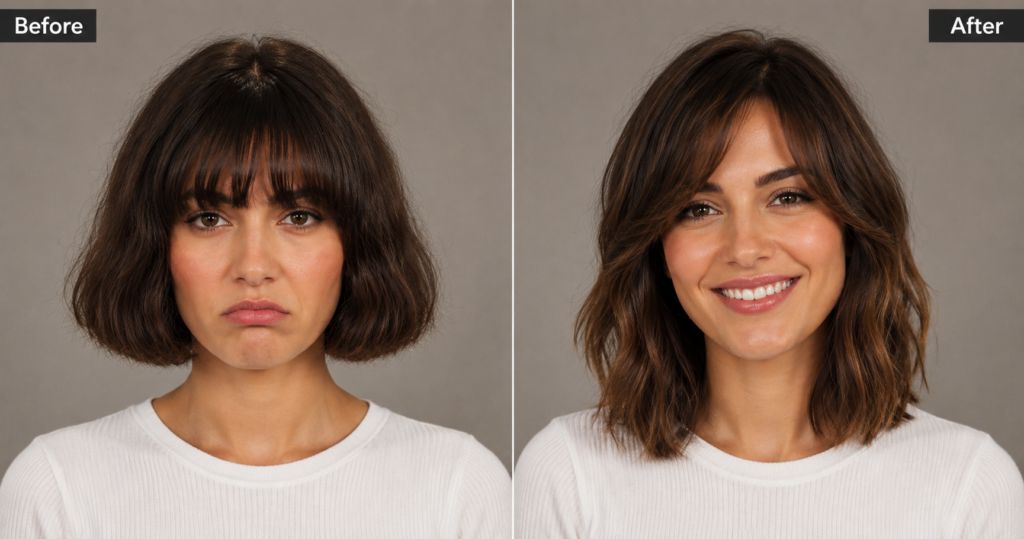
Before and After: What to Expect
| Feature | Before (Common Mistake) | After (Optimized Approach) |
|---|---|---|
| Length choice | Chin-length blunt bob that hits at the widest point of the face | Long bob or lob sitting just below the jaw, or long layers past the collarbone |
| Volume placement | Volumizing at the sides, especially at cheekbone level | Volume lifted at the crown, kept flat and close at the temples |
| Fringe style | Blunt, full fringe that cuts across the forehead horizontally | Side-swept or curtain bangs that create a diagonal line across the forehead |
| Layer placement | Heavy layers at cheekbone height adding visual width | Long face-framing layers angled downward toward the chin |
| Parting choice | Center part that emphasizes equal width on both sides | Deep side part that breaks the symmetry and elongates visually |
| Result | Face reads rounder and wider, even with a technically “good” cut | Face appears longer, more oval, with stronger jaw definition |
The Protocol
Follow these steps in order, skipping step two is exactly what causes a haircut for round face shapes to look great at the salon but weird at home.
Step 1 — Identify your actual face shape first.
Not every round-ish face is the same. Measure your cheekbone width versus your face length from hairline to chin. If the numbers are within about half an inch of each other, you’re working with a round shape. This step matters because some faces are more heart-shaped or oval-leaning, and those have different rules.
Step 2 — Choose the right length category.
For most round faces, there are two reliable zones: the long bob (lob) sitting one to two inches below the jaw, or long layers falling past the collarbone. Avoid anything that ends exactly at the jaw or cheekbone. That’s the zone that actively adds width.
Step 3 — Request face-framing layers angled downward.
Tell your stylist you want layers that start at the cheekbone and cut diagonally down toward the chin. This is different from standard face-framing, which often sits at cheekbone level and fans outward. Downward-angled layers draw the eye toward the jaw, not sideways.
Step 4 — Add a deep side part or curtain bangs.
Either option breaks the horizontal symmetry of a round face. Curtain bangs in particular create a diagonal opening at the center that reads as added vertical length. I tried these myself about six weeks before my derm appointment last spring, they genuinely changed how my face photographed.
Step 5 — Finish with a weight-forward styling product.
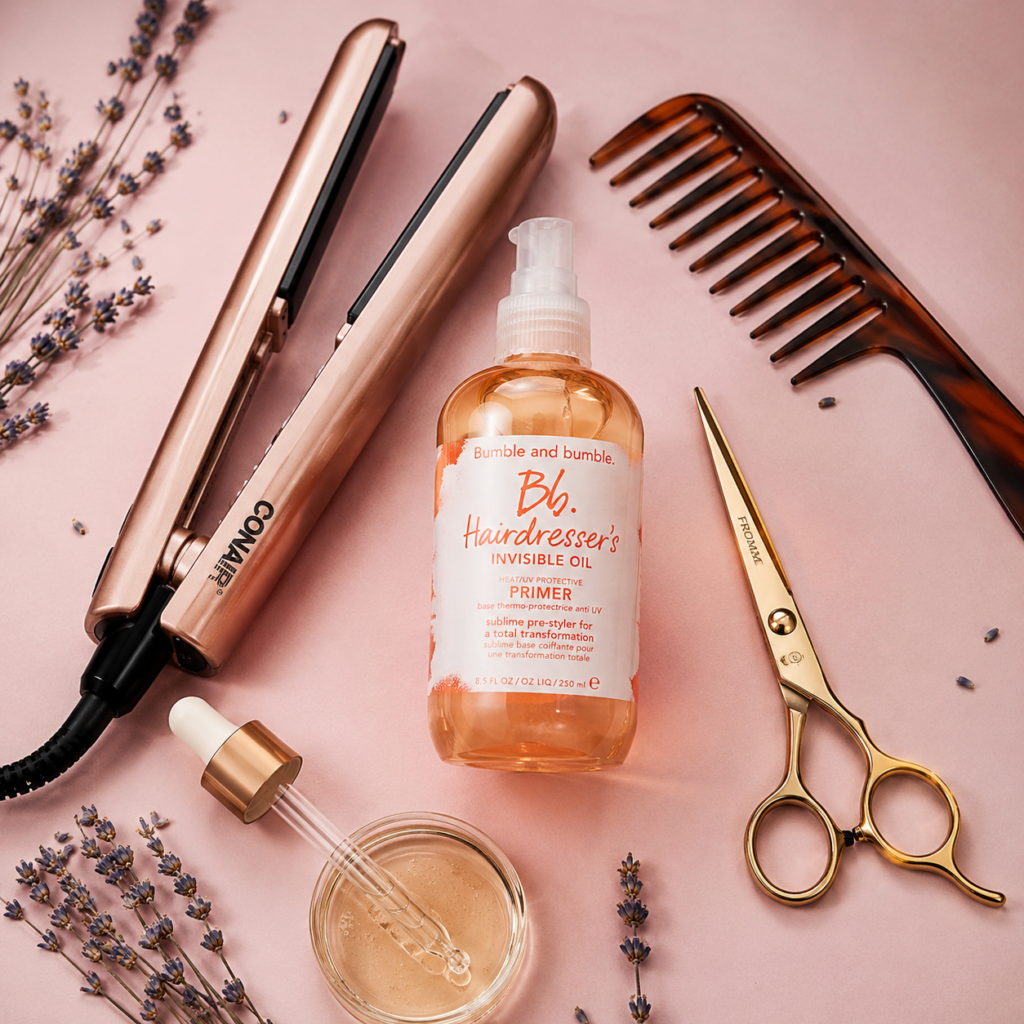
Volume at the roots is great. However, you want the ends to fall with weight, not puff outward. Apply a smoothing oil like the Bumble and bumble Hairdresser’s Invisible Oil to mid-lengths and ends to keep them sleek and directed downward, not fluffed at the sides.
Step 6 — Diffuse or blow-dry lifting the crown only.
Direct your dryer upward at the roots near the crown, not at the sides. For wavy or curly hair, diffuse with your head flipped forward, then clip the roots at the crown for two minutes after. This one technique adds more visual length than most cuts do on their own.
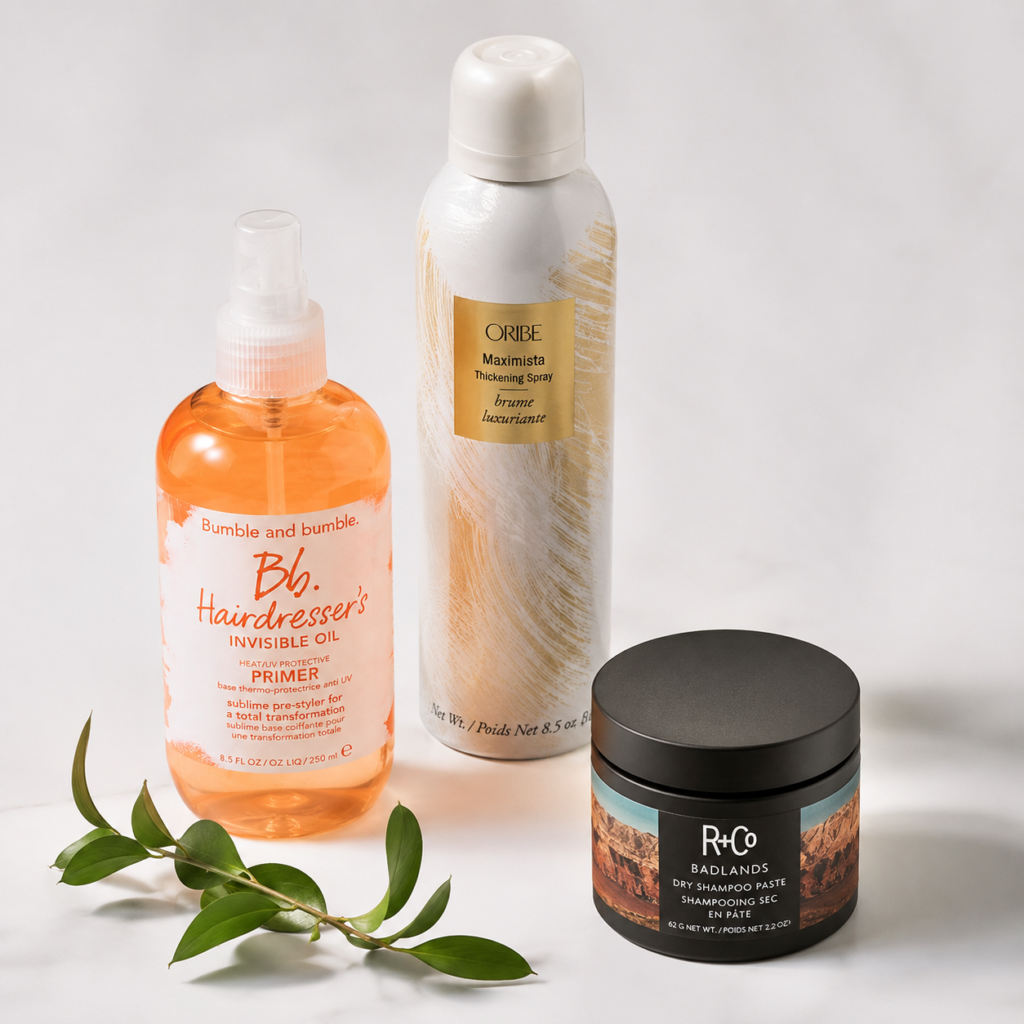
Drugstore Gems vs. Salon Standards: Round Face Styling Products
| Feature | Drugstore Pick | Salon Professional |
|---|---|---|
| Smoothing serum | Garnier Fructis Sleek and Shine Serum, lightweight, affordable, good for fine hair | Bumble and bumble Hairdresser’s Invisible Oil, richer slip, better for medium to thick hair that needs real weight |
| Root-lifting spray | TRESemmé Root Lifting Spray, decent volume, can feel stiff by midday | Oribe Maximista Thickening Spray, flexible hold, keeps volume without crunch |
| Diffuser attachment | Generic universal diffuser, works fine for 3A to 3B curl patterns | Xtava Black Orchid Diffuser, fits most barrel sizes, distributes heat more evenly |
| Hold for curtain bangs | Got2b Glued Styling Gel, small amount at the part line only | R+Co Badlands Dry Shampoo Paste, adds texture and directional hold without crunch |
| Overall finish | Good for daily maintenance, may need reapplication by afternoon | Lasts through humidity, holds style direction without weighing hair flat |
Porosity Check Sidebar
Why porosity matters for round-face styling:
High-porosity hair absorbs products fast but releases moisture quickly, meaning your sleek haircut for round face styling may frizz within an hour. Low-porosity hair resists absorption, so lighter serums tend to work better than thick oils. Do the strand test: drop a clean hair into a glass of water. Sinks fast = high porosity. Floats = low. This affects which smoothing product actually keeps your haircut for round face styles sleek and properly shaped all day.
Frequently Asked Questions
Does a pixie cut work for a round face shape?
It can, but only with very specific styling. A pixie with volume and height at the crown, tapered close at the sides, tends to elongate a round face effectively. The problem is that a cropped, flat pixie with no lift actually emphasizes width. Most round-face guides say avoid short cuts entirely, but I disagree, execution matters more than length category.
What’s the worst haircut for a round face?
A blunt chin-length bob with a center part. I’ve tested this personally, three bottles of dry shampoo into a bob phase last year, and that specific combination consistently read as widening in photos regardless of styling. It hits the face at its widest point and creates equal visual weight on both sides. That’s the double-trouble combination to avoid.
Can layers make a round face look worse?
Yes, if they’re placed wrong. Layers that end at cheekbone level and fan outward add width rather than removing it. However, long layers that angle downward from cheekbone to chin work well. The direction of the layer matters more than the presence of layers. Ask your stylist specifically for “downward-angled face-framing layers.”
Do curtain bangs actually help round faces?
Generally, yes. Curtain bangs create a triangular opening at the center of the forehead, which adds perceived vertical length. Furthermore, a deep center part combined with curtain bangs breaks horizontal symmetry, which is the main visual issue for round faces. That said, very wide curtain bangs that open broadly at the temples can work against you, keep the opening narrow.
The Amber Verdict
The bottom line is that the best haircut for round face isn’t one single cut, it’s a specific set of choices around length, layer direction, parting, and finish working together. Get one wrong and the others stop working. My honest opinion: most stylists default to “long layers” without asking about your parting or volume habits at home, and that’s where the disconnect happens. Pin this guide, bring it to your next appointment, and have a real conversation about all of it.