
Lip liner has quietly become one of the most important products in a modern makeup routine. While lipstick and gloss usually get all the attention, the right lip liner can completely change how your lips look. How to apply lip liner is one of the most common questions among makeup beginners because a good technique can define your natural lip shape, prevent feathering, improve lipstick longevity, and even create the appearance of fuller lips without looking overdone.
If you’ve ever wondered how to apply lip liner naturally, how to make lips look bigger with lip liner, or whether lip liner should go on before lipstick, you’re not alone. Many beginners avoid lip liner because they’re worried about harsh lines or a dated look. Fortunately, today’s techniques focus on soft blending and natural definition.
In this guide, you’ll learn how to apply lip liner step by step, choose the right shade, avoid common mistakes, and use professional makeup artist tricks for a polished finish.
Understanding Your Lip Shape Before You Begin
Before applying any product, it helps to understand your natural lip shape. Different techniques work better for different lips, and knowing your shape can make it much easier to apply lip liner in a way that looks balanced and flattering.
Full Lips
If you already have full lips, focus on defining your natural lip line rather than overlining. A lip liner shade that closely matches your natural lip tone will create beautiful definition without looking heavy.
Thin Lips
For thinner lips, strategic overlining can help create the illusion of volume. The key is to overline only the center areas rather than extending beyond the corners.
Uneven Lips
Many people have slight asymmetry. Lip liner can help balance uneven areas and create a more symmetrical appearance.
Defined Cupid’s Bow
A naturally defined cupid’s bow looks beautiful when emphasized with precise lip liner application.
Less Defined Lip Borders
If your lip borders are less visible, a lip pencil can create clearer definition and help lipstick stay within the lines.
The Tools That Make Application Easier
Having the right tools can make a huge difference in your final result.
Lip Pencil Types
There are two main options:
- Traditional lip liner pencils
- Retractable lip liners
Traditional pencils often provide more precision because they can be sharpened to a fine point.
Recommended Product:
Long-Wear Lip Liner Pencil
Retractable vs Traditional Pencils
Retractable formulas are convenient, while traditional pencils usually offer sharper, cleaner lines.
Lip Brushes
A small lip brush helps blend lip liner naturally and prevents harsh edges.
Recommended Product:
Professional Lip Brush
Makeup Mirrors
Good lighting improves precision and helps you see your natural lip line more clearly.
Recommended Product:
LED Vanity Mirror
Pencil Sharpener
A sharp tip creates cleaner lines and more control.
Recommended Product:
Makeup Pencil Sharpener
Lip Prep Matters More Than Most People Think
One of the biggest lip liner mistakes is applying product on dry lips.
Exfoliation
Removing dry skin creates a smoother surface and prevents patchiness.
A gentle lip scrub once or twice a week is usually enough.
Recommended Product:
Lip Scrub
Hydration
Apply a lightweight lip balm before starting your makeup routine.
Let it absorb for a few minutes before applying liner.
Recommended Product:
Hydrating Lip Balm
Priming the Lip Area
If you want long-lasting lip makeup, lightly blot excess balm before applying liner. This helps products adhere better.
Finding the Most Flattering Shade
Many people ask, “What color lip liner should I use?”
The answer depends on your desired look.
Nude Tones
Nude lip liners are the most versatile option. They work well for everyday makeup and natural-looking lips.
Pink Tones
Pink shades pair beautifully with rosy lipsticks and fresh makeup looks.
Brown Tones
Brown lip liners can add depth and contour. Choose a shade that isn’t dramatically darker than your lipstick.
Deeper Shades
Deeper lip liner shades work best when blended carefully to avoid a harsh contrast.
Matching Different Lipstick Colors
As a general rule, choose a liner that matches your lipstick or is slightly deeper for added dimension.
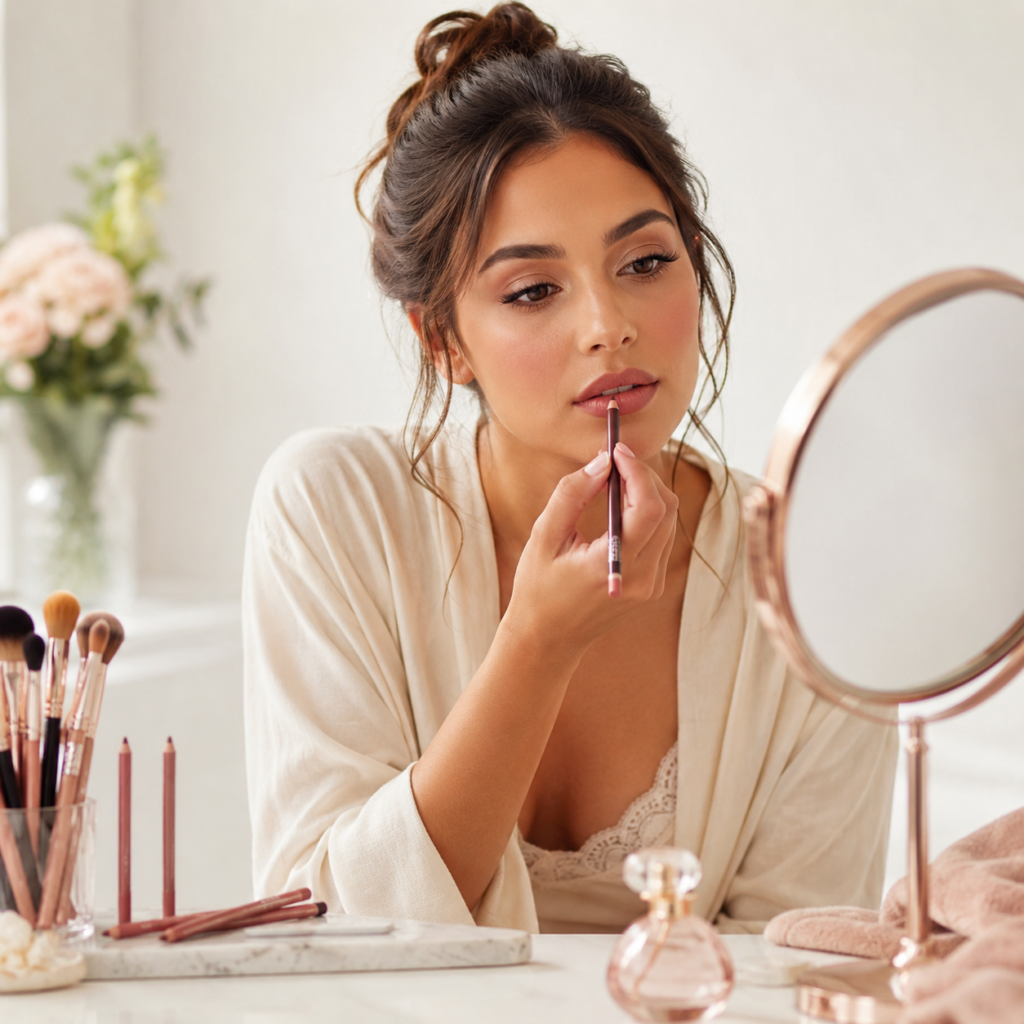
Step-by-Step Lip Liner Application
Now let’s cover exactly how to apply lip liner for beginners and create a more defined, natural-looking lip shape.
Step 1: Map the Cupid’s Bow
Start at the center of your upper lip.
Create a small “X” shape at the cupid’s bow to establish symmetry.
This technique helps define lips naturally and creates a balanced appearance.
Step 2: Define the Lower Lip
Draw a short line at the center of the bottom lip.
Focus on following your natural lip shape.
Step 3: Connect the Outer Corners
Using small strokes, connect the corners of your mouth to the center sections.
Avoid drawing one continuous line. Small strokes provide more control and a more natural result.
Step 4: Refine Uneven Areas
Check for asymmetry and make minor adjustments.
This is especially helpful for uneven lips.
Step 5: Fill the Lips for Longer Wear
One makeup artist lip liner tip is to lightly fill in the lips after outlining them.
This creates a base that helps lipstick last longer throughout the day.
Step 6: Soften the Edges
Use a lip brush to blend the edges slightly.
This step helps create natural-looking lips and prevents obvious outlines.
The Most Natural Way to Overline
Many people want to know how to overline lips without looking fake.
The secret is subtlety.
Where Makeup Artists Overline
Professional artists typically overline:
- The center of the upper lip
- The center of the lower lip
These areas naturally catch light and create the illusion of fullness.
Where They Never Overline
Avoid extending beyond:
- The outer corners
- The sides of the mouth
Overlining these areas often looks unnatural.
Creating Balance Without Looking Fake
Use a shade close to your natural lip color and blend thoroughly.
The goal is enhancement, not transformation.
How Different Finishes Change the Look
The way you pair lip liner with other lip products can completely change the final effect, which is why learning how to apply lip liner correctly makes such a difference.
Matte Lipstick Pairings
Matte lipstick works especially well with lip liner because both products help create sharp definition.
To avoid a dry appearance:
- Prep lips thoroughly
- Use a hydrating lip balm beforehand
- Blend the liner softly rather than leaving a harsh outline
Satin Lipstick Pairings
Satin formulas provide a softer and more forgiving finish.
They are ideal for beginners because they blend easily with lip liner and create a natural-looking result.
Lip Gloss Pairings
One of the easiest ways to make lips appear fuller is pairing lip liner with gloss.
After applying and blending your liner:
- Fill the lips with lipstick or liner.
- Add gloss to the center of the lips.
- Let the reflected light create a plumper appearance.
This technique works especially well for natural lip liner looks.
Recommended Product:
Non-Sticky Lip Gloss
Lip Oil Pairings
Lip oils provide hydration and shine while keeping lips comfortable throughout the day.
They work beautifully over nude lip liner and soft pink lip liner shades.
Recommended Product:
Hydrating Lip Oil
How to Adjust Lip Liner for Different Occasions
Not every lip look requires the same amount of definition.
Everyday Makeup
For daily wear:
- Use a nude lip liner
- Follow your natural lip line
- Blend thoroughly
- Finish with lip balm, lip oil, or gloss
The result feels effortless and polished.
Work Makeup
For professional settings:
- Stick to natural shades
- Avoid dramatic overlining
- Focus on clean lip definition
This helps create a polished appearance without drawing excessive attention.
Evening Makeup
Evening looks allow for slightly more definition.
You can:
- Use a slightly deeper lip liner shade
- Add more contour to the lips
- Pair with a bold lipstick
Special Events
For weddings, parties, and celebrations:
- Fill the entire lip with liner first
- Layer lipstick over top
- Add gloss if desired
This combination helps lip color last longer during long events.
Photography and Flash Photography
This is an area most tutorials overlook.
For photos:
- Avoid extremely dark liner
- Blend carefully
- Choose shades close to your lipstick
Harsh outlines often appear more dramatic in photographs than they do in person.
Professional Tricks That Instantly Improve Results
Professional makeup artists often use simple techniques that dramatically improve the final look.
Use Short Strokes Instead of One Long Line
Many beginners try to draw their entire lip outline in one motion.
Instead:
- Work in small sections
- Use light pressure
- Build definition gradually
This creates more precise lip lines.
Blend With a Brush Instead of Your Finger
A lip brush offers better control and creates a softer transition between products.
This simple step instantly makes lip liner look more professional.
Layer Products Strategically
For long-lasting lip makeup:
- Outline lips
- Fill lips with liner
- Apply lipstick
- Blot
- Apply a second thin layer
This layering method improves wear time significantly.
Build Depth Without Harsh Contrast
One common lip liner mistake is choosing a liner that is much darker than the lipstick.
Instead:
- Use similar tones
- Blend carefully
- Create subtle dimension
The result appears modern and flattering.
Lip Liner Mistakes That Age Your Makeup
Certain techniques can unintentionally make makeup look outdated.
Heavy Outlining
A thick, visible outline around the lips rarely looks modern.
Instead, blend the edges for a softer finish.
Excessive Overlining
Overlining too far beyond the natural lip line can create an artificial appearance.
Focus on the center areas only.
Dry Lip Texture
Lip liner tends to emphasize dry patches.
Regular exfoliation and hydration help maintain smooth lips.
Harsh Color Contrast
Using a very dark liner with a light lipstick can sometimes appear dated.
A more blended approach generally looks fresher and more flattering.
Long-Wear Techniques for All-Day Makeup
If your goal is transfer-proof lip makeup that lasts through meals and drinks, these tips can help.
Preventing Feathering
Feathering occurs when lip color migrates into fine lines around the mouth.
To reduce feathering:
- Use lip liner around the perimeter
- Fill in the lips completely
- Apply lipstick afterward
Preventing Smudging
Smudging often happens when lips are overly moisturized before makeup.
Blot excess balm before applying liner.
Making Color Last Through Meals
A simple trick is filling the entire lip with liner before adding lipstick.
Even if lipstick fades slightly, the base color remains underneath.
Touch-Up Strategy
Carry:
- Your lip liner
- Lipstick or gloss
A quick touch-up after meals helps maintain a polished look all day.
Frequently Asked Questions
Is Lip Liner Necessary?
No, but it can improve definition, help lipstick last longer, and create a more polished appearance.
Should Lip Liner Match Lipstick?
Generally, yes. A liner that closely matches your lipstick or natural lip color usually creates the most seamless look.
Can Lip Gloss Be Applied Over Lip Liner?
Absolutely.
Many makeup artists use lip liner with gloss to create fuller-looking lips while maintaining shape and definition.
Why Does Lip Liner Feather?
Feathering often occurs because of dry skin, product migration, or skipping lip liner around the edges of the lips.
Can You Wear Lip Liner Alone?
Yes.
Many people fill in their entire lips with lip liner and wear it alone for a soft matte finish.
How Do Makeup Artists Make Lips Look Fuller?
They usually:
- Slightly overline the center of the lips
- Blend thoroughly
- Add brightness or gloss to the center
These techniques create the illusion of volume without obvious overlining.
Should Lip Liner Go On Before Lipstick?
In most cases, yes.
Applying lip liner before lipstick helps define the lips and provides a base that improves longevity.
What Color Lip Liner Should Beginners Choose?
A nude shade close to your natural lip color is usually the safest and most versatile option.
Final Thoughts
Learning how to apply lip liner doesn’t have to be complicated. Once you understand your natural lip shape, choose a flattering shade, and master a few simple techniques, lip liner becomes one of the easiest ways to elevate your makeup routine.
Whether your goal is natural-looking lips, fuller lips, longer-lasting lipstick, or cleaner definition, the key is subtle application and proper blending. Small adjustments often create the most beautiful results.
Start with a shade close to your natural lip tone, use short strokes instead of heavy lines, and remember that blending is what transforms lip liner from obvious to effortlessly polished.